
← Browse tech deals
TECH DEAL COMPASS

How to Add RAM and Upgrade Storage Yourself vs. Paying for a Pre-Configured Spec

Upgrading a pre-configured laptop or desktop from 16GB to 32GB RAM or from 512GB to 2TB SSD at checkout can easily add $200 to $400 to your purchase price. But performing the upgrade yourself with standard retail components takes 15 minutes, saves up to 60%, and often yields superior performance. Here is how to verify slot compatibility, avoid soldered RAM traps, understand your warranty rights, follow a step-by-step DIY installation, and shop today’s best live SSD upgrade deals.

The 60-Second Verdict: Beat the Manufacturer "Spec Tax"

Configuring extra RAM and storage at the factory is the most lucrative profit center for PC manufacturers. Clicking the button to upgrade from 16GB to 32GB of RAM on Dell, Lenovo, HP, or Apple configurators regularly adds $150 to $250. Jumping from a 512GB SSD to a 2TB SSD adds another $250 to $400.

The DIY Reality: A standard 32GB DDR5 SODIMM laptop memory kit costs roughly $75 to $95 off the shelf. A blazing-fast 2TB PCIe 4.0 NVMe SSD costs between $130 and $160. Doing the upgrade yourself takes 15 minutes with a standard small screwdriver, saves you $200 to $450 in cash, and often gets you faster, higher-end TLC flash than the generic cost-reduced SSDs computer makers bury in prebuilt systems.

Phase 1: The "Check Before You Buy" Golden Rules

Before counting on a DIY upgrade, you must verify that the machine you are buying physically supports user upgrades. The industry has shifted aggressively toward soldered components in certain categories.

Rule 1: Soldered RAM vs. Modular SODIMM Slots

Modern ultra-thin laptops—especially those powered by Intel Lunar Lake (Core Ultra 200V), AMD Ryzen AI 300, Qualcomm Snapdragon X Elite, and all Apple Silicon MacBooks—use soldered LPDDR5X memory directly attached to the system board or integrated on the CPU package.

⚠️ If the memory is listed as "LPDDR5" or "soldered", it can NEVER be upgraded. You cannot pop open the chassis and add RAM later. If you are buying a thin-and-light laptop with soldered RAM, buy 16GB or 32GB upfront.

Where RAM is still upgradeable: Mid-size (15.6-inch and 16-inch) budget laptops, almost all gaming laptops (ASUS TUF, Lenovo Legion/LOQ, Acer Nitro, HP Victus), corporate lines (ThinkPad E/L series, Latitude 3000/5000), and all desktop towers and mini PCs feature 1 or 2 standard DDR5 SODIMM slots that can be upgraded in minutes.

Rule 2: M.2 NVMe SSD Form Factors & Dual Slots

Almost all modern Windows laptops (and desktop PCs) use the standard M.2 2280 NVMe SSD form factor (22mm wide by 80mm long). Handheld PCs (Steam Deck, ROG Ally) and some ultra-compact laptops use smaller 2230 or 2242 drives.

The Dual-Slot Secret: Many 15.6-inch and 16-inch laptops include a second, empty M.2 NVMe slot. This is the holy grail of DIY upgrading. You don't have to touch your existing Windows installation, back up data, or clone anything. You simply pop in a 1TB or 2TB drive into the empty secondary slot, format it as drive D:, and instantly double or quadruple your storage.

The Real Financial Math: Pre-Configured Spec Tax vs. DIY Street Prices

Here is what manufacturers actually charge for memory and storage upgrades compared to buying retail parts on sale:

Upgrade TierManufacturer Configurator PriceDIY Retail Component PriceYour Cash Savings
16 GB → 32 GB DDR5 RAM$160 – $220$75 – $95 (Crucial / Kingston DDR5-5600)Save $85 – $125 (55%)
512 GB → 1 TB NVMe SSD$120 – $160$65 – $75 (Crucial P310 1TB Gen4)Save $55 – $85 (50%)
512 GB → 2 TB NVMe SSD$280 – $380$130 – $160 (WD_BLACK / Kingston 2TB)Save $150 – $220 (54%)
Full Workstation: 32GB RAM + 2TB SSD$440 – $600$205 – $250 (Both DIY parts)Save $235 – $350 (55%)

Step-by-Step DIY Upgrade Guide (What It Actually Takes)

Upgrading a laptop or desktop does not require a computer science degree. Here is the exact procedure:

Tools You Need (Under $10 on Amazon):

  • A small Phillips precision screwdriver (usually #00 or #0).
  • A thin plastic pry tool, guitar pick, or old credit card (avoids scratching plastic or aluminum clips).
  • Optional for single-drive upgrades: A $15 USB-C M.2 external NVMe enclosure for cloning.

Step 1: The Non-Negotiable Battery Safety Step

Power the laptop completely off and disconnect the power cord. Unscrew the bottom panel screws (tip: arrange them on a table in the exact pattern of the laptop, as corner screws are often longer than front screws). Use your plastic pry tool to unclip the edges. Before touching any silicon, unplug the internal battery connector from the motherboard. This eliminates any risk of shorting out the board if a metallic screw slips.

Step 2: Upgrading RAM in 60 Seconds

Locate the SODIMM slots (frequently covered by a thin metallic shield or plastic film). To remove an existing stick, gently push the two side retaining metal clips outward; the RAM stick will immediately pop up at a 30-degree angle. Slide it out. Take your new DDR5 stick, align the notch with the socket key, insert it firmly at a 45-degree angle, and press down until the side clips click securely into place.

Step 3: Upgrading Storage (M.2 NVMe SSD)

Locate the M.2 slot and remove the small retention screw at the tail end. Slide the new M.2 2280 drive into the connector at a 30-degree angle until contacts are hidden. Push the drive flat against the standoff and screw it down snugly (finger-tight; do not overtighten). Reconnect the battery cable and snap the bottom panel back on.

Step 4: Managing Windows (Secondary Slot vs Single Slot)

If you added the SSD to an empty second slot, simply boot into Windows, right-click Start → Disk Management, click "Initialize Disk", and format it as NTFS (Drive D:). You are done. If you replaced your only drive, plug the new drive into an external $15 USB-C NVMe enclosure before opening the laptop, use free software like Macrium Reflect or Clonezilla to clone your drive in 15 minutes, then swap the physical drives.

The Warranty Myth: Does Opening Your Laptop Void Your Warranty?

One of the biggest hesitations shoppers face is the fear that unscrewing a laptop bottom panel will instantly void their manufacturer warranty.

🛡️ The Law Is on Your Side (Magnuson-Moss Warranty Act):

Under federal US law (the Magnuson-Moss Warranty Act, enforced by the Federal Trade Commission), manufacturers cannot void your warranty simply because you opened the chassis, broke a "warranty void if removed" sticker, or upgraded RAM and storage.

The Only Real Exception: If you physically damage a component during the procedure (for instance, if your screwdriver slips and gouges a motherboard trace, or you puncture the lithium-ion battery), that user-induced damage is not covered. Keep your original factory RAM sticks and SSD in an anti-static bag; if your laptop ever needs motherboard service under warranty, simply pop the original components back in before shipping it to the manufacturer.

Featured Live Storage Deals: Top M.2 NVMe SSDs for DIY Upgrades

If you are planning to upgrade an existing laptop or customize a newly purchased budget laptop, here are top-tier PCIe 4.0 NVMe SSD deals handpicked from our live price scanner:

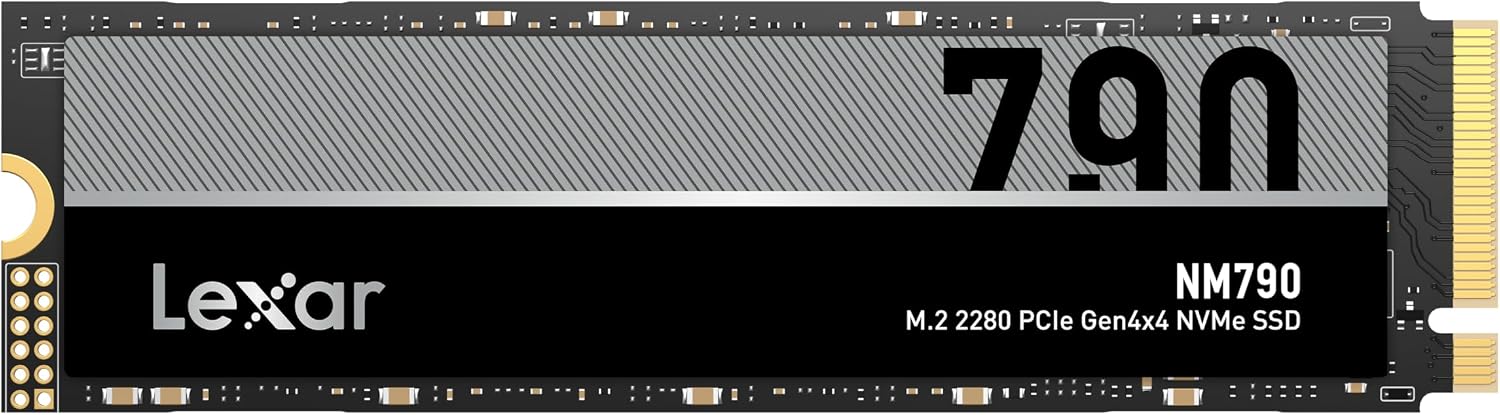
Lexar 4TB NM790 Internal NVMe SSD, 7400/6500 MB/s, M.2 2280, PCIe Gen 4x4Ultimate 4TB Vault for Power Users ($202.00)
Capacity & Use: 4,000 GB (4 TB) · Heavy 4K/8K video archives, creative studio libraries, complete game collections

Lexar 4TB NM790 Internal NVMe SSD, 7400/6500 MB/s, M.2 2280, PCIe Gen 4x4

Form Factor: M.2 2280Interface: PCIe 4.0 NVMeBrand: Lexar23% Off MSRP
Live Cross-Store Pricing Check:
Amazon
$579.00
Lowest Price
Newegg
$705.99

Why it fits a DIY upgrade: Massive 4TB NVMe storage under $205. If you tried to configure a 4TB SSD directly from Lenovo, HP, or Dell, they would charge an astronomical $600 to $900. Doing it yourself saves hundreds while giving you enough high-speed storage for a lifetime of photos and games.

Installation & clearance check: Check if your motherboard BIOS supports 4TB M.2 partition addressing (all modern UEFI systems do).

The 6-Point DIY Upgrade Checklist Before Buying a Laptop

  • 1. Check if RAM is soldered before checkout: Look up the laptop model on the manufacturer website or Crucial Advisor. If the specs say "LPDDR5" or "soldered memory", buy 16GB or 32GB on day one. If it says "DDR5 SODIMM (1 or 2 slots)", you can upgrade later.
  • 2. Look for dual M.2 SSD slots: Laptops with two M.2 slots give you effortless expansion. You can pop in a 1TB or 2TB drive anytime without cloning or formatting your operating system drive.
  • 3. Verify M.2 form factor length: Standard laptops take M.2 2280 (80mm). Ultra-compact devices (Steam Deck, Surface Pro) require M.2 2230. Confirm the length before ordering an SSD.
  • 4. Match RAM generation & frequency: If your laptop uses DDR5-5600 SODIMM, do not buy DDR4 or lower-speed RAM. DDR4 and DDR5 memory notches are physically in different positions and will not fit each other's slots.
  • 5. Buy a bare or graphene SSD for laptops: Bulky desktop SSDs with massive aluminum finned heatsinks usually will not fit under a thin laptop bottom panel. Choose single-sided drives or drives with slim graphene heat spreaders like the Crucial P310 or Kingston FURY.
  • 6. Disconnect the battery first: Always disconnect the internal battery cable before touching RAM or SSD slots. It is the single most important safety step in DIY hardware upgrades.